
Welcome to the Optinet FLEX Training Portal. Call us on 0845 313 0233 / 01684 577 900.
 Dispense
A separate, printable guide is available here
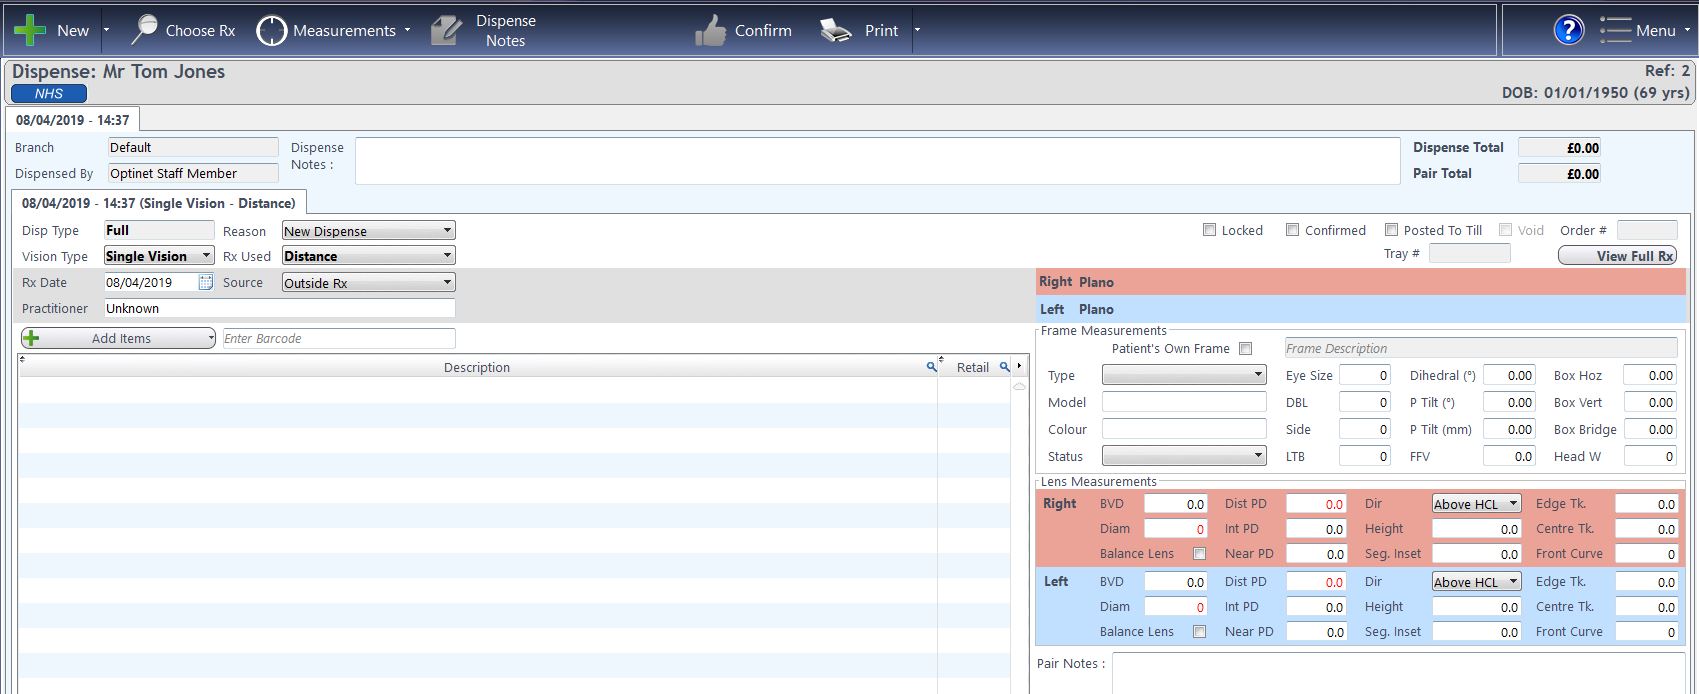
The Dispense module is the start of the next part of the Patients journey. They have booked and attended their Appointment and had their Tests carried out by the Optom. The DO will now create their Dispense. The default screen is shown below, and you can get to this by clicking Dispense in the left-hand side bar.
The "New" button is to create a new pair. For a remake or a re-glaze, right-click on the relevant pair in the previous dispense in question (on the above example, marked 02/05/2017 - 14:43....), and the menu below appears:
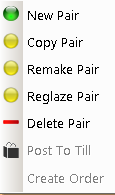 |
New Pair - Create a new Pair Copy Pair - Copy relevant details to create a new pair - brings up the first box shown below. Remake Pair - Brings up the second box shown below. Reglaze Pair - Brings up the third box shown below. Delete Pair - Deletes the pair in question. Post to Till - Posts the confirmed Dispense to the Till Create Order - Creates an Order |
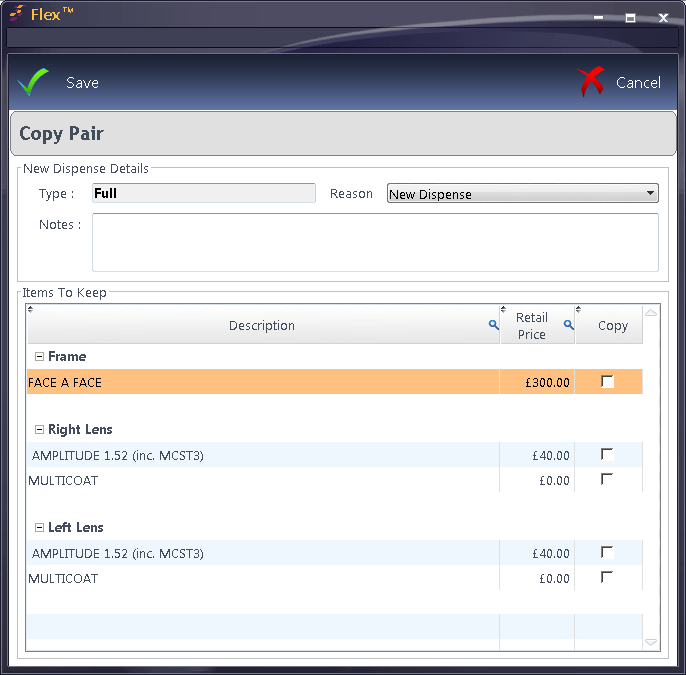
| Copy Pair |
 |
|
When you choose Copy Pair, the screen above is shown. You can choose the Reason (which is customisable under How Do I Manage Spec Lenses?) and then tick which items you wish to preserve. You can also add any relevant notes. |
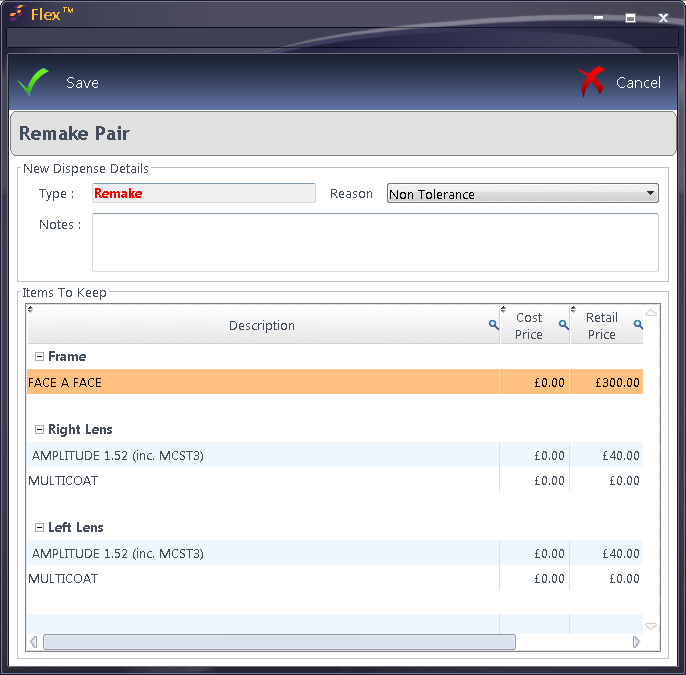
| Remake Pair |
 |
|
When you choose Remake Pair, the screen above is shown. You can choose the Reason(which is customisable under How Do I Manage Spec Lenses?) and then tick which items you wish to preserve, and (out of picture), enter a relevant remake price. You can also add any relevant notes. |
| Reglaze Pair |
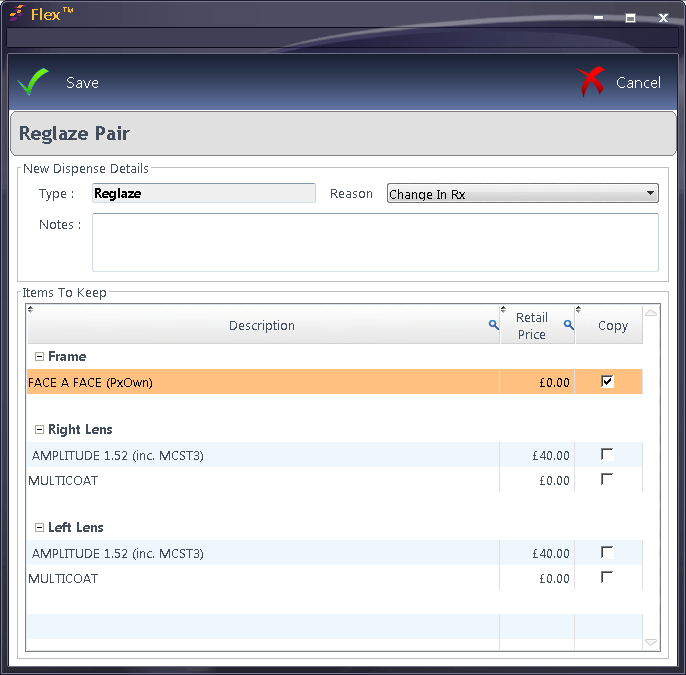 |
| When you choose Reglaze Pair, the screen above is shown.
You can choose the Reason (which is customisable under How Do I Manage Spec Lenses?) and then tick which items you wish to preserve - the frame is ticked by default. You can also add any relevant notes. |
If one of these three options are used, the Disp Type will be automatically populated with this once the Dispense is started. Otherwise, it will be "Full".
Descriptions of other buttons (explained in full under How Do I Dispense Frames and Lenses?)
Choose Rx - The latest Rx will be used by default. To choose a previous examination, click this button.
Trace Frame - Links to a VCA Tracer to bring in Frame measurements for Remote Edging.
Dispense Notes - View Optometrists Note for the Test in question, including any recommendations.
Eyeplan - Please contact Eyeplan directly for more information.
Confirm - Pressing this button will create an Order and add items to / generate a Till receipt.
Print -Printing Options around Dispense Details, a Dispense Confirmation or a Letter from the database.
Please now click to How Do I Dispense Frames and Lenses? for a step by step guide on how Dispense works in FLEX.