
Welcome to the Optinet FLEX Training Portal. Call us on 0845 313 0233 / 01684 577 900.
 How Do I Dispense Frames and Lenses?
A separate, printable guide is available here
On the primary Dispense screen, Press New to create a new Dispense for the Active Patient, or search for a patient by pressing the downward facing triangle at the right-hand side of New (this page is shown here).
For Reglaze and Remake options, please right-click on the previous dispense in question. More details about how to create pairs of this type are shown on the main Dispense page.
If the Optom has added any Clinical Notes for the DO, these will automatically appear (you can click Dispense Notes to get back onto these):
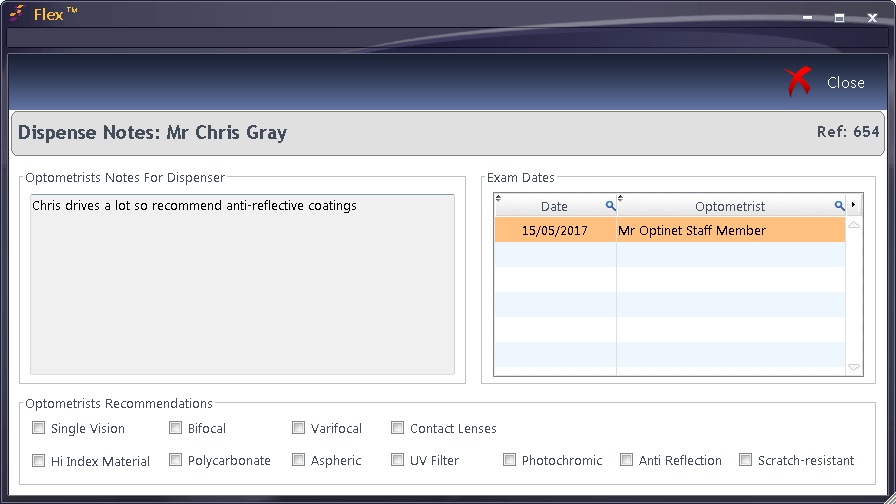
The latest (Given) Rx is being used. A different Rx can be chosen using Choose Rx: a box will come up and you can choose an Rx from the list (sorted by date).
With the relevant notes understood (and shared with the Patient if necessary) and the Rx we wish to use for the Dispense in place, we can now continue. The Rx in question is shown under where Order Rx is displayed towards the top-right of the Dispense window. Note that this was updated in February 2018 to show the relevant Rx parameters based on Dispense type. Please see the picture below for more information on viewing the whole prescription (View Full Rx).

Disp Type: Full by default. Other types (such as remake or reglaze) are customisable under Setup - How Do I Modify my Orders Screen? and are selected before the Dispense is started.
Reason: Also customisable under the above setting, reasons (New Dispense by default) could include Frame Fault or a non-tolerance.
Vision Type: Choose from Single Vision, Bifocal, Progressive. The latter two choices will require validation for lens heights, directions, etc.
Rx Used: Distance, Intermediate, Near are your options for Single Vision, Distance / Near, Distance / Intermediate, Intermediate / Near are your options for Bifocal and Progressive vision types.
Source: The Rx source is the (latest) Test Record by default - if you choose Outside Rx, you can enter your own values in on the top right-hand side of the image above.
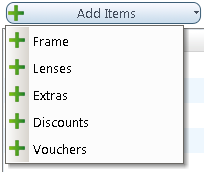
Press + Add Items and the menu below appears.
Add Frame
The box below appears when you press Add Frame.
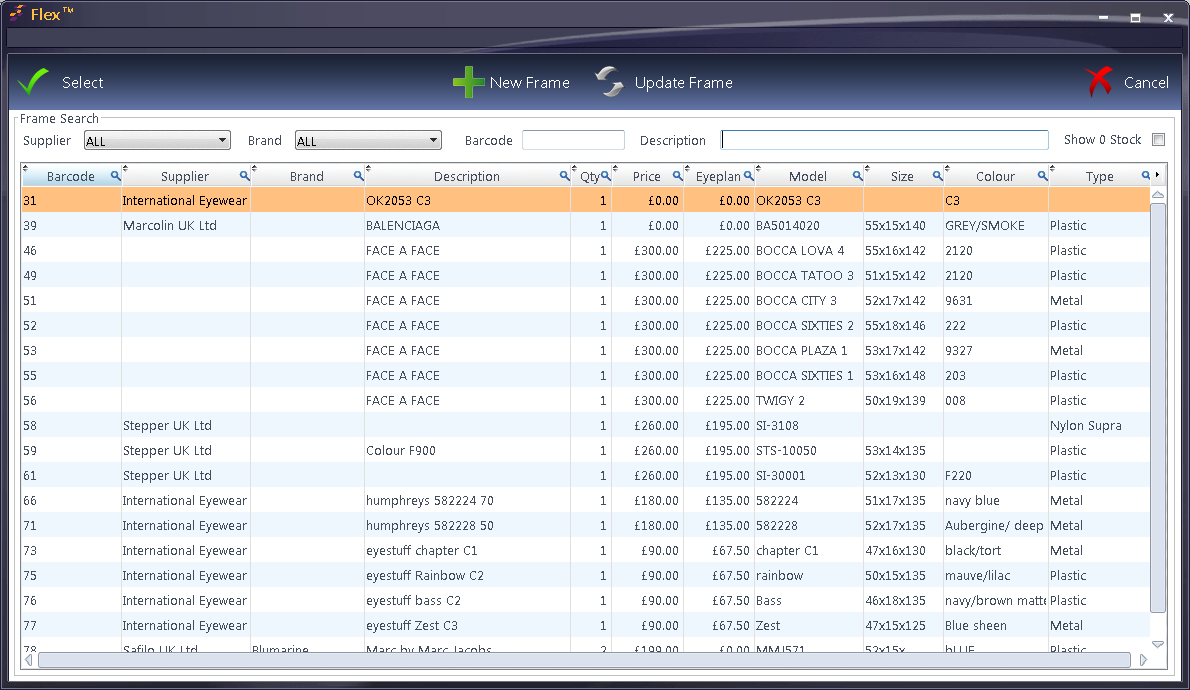
A Frame can be added by:
Further details regarding Frame Measurements are discussed later on this page. It is worth noting now that this also includes a tickbox called Patient's Own Frame which is used for "lens to own" dispenses. In this case, the frame details can be over-typed.
Add Lenses
Lenses are discussed below the screenshot.

Stock / Surfaced: The option to filter the displayed results
Supplier: Choose to just view lenses from a specific catalogue (customisable under Setup - How Do I Manage Spec Lenses? - default is ALL)
Lens Code: Enter a lens code to go directly to the lens required.
Lens Description: Enter a lens description to go directly to the lens required.
Vision Type: Generally Single Vision, Bifocal or Progressive - other options may appear depending on lens data in use.
Material: The option to display just Plastic or Glass.
You also have the option to only display lenses within a certain Index range or for a specific blank size (by default the Diameter is ALL).
Double-click on a lens to choose it. The box will update as shown below:
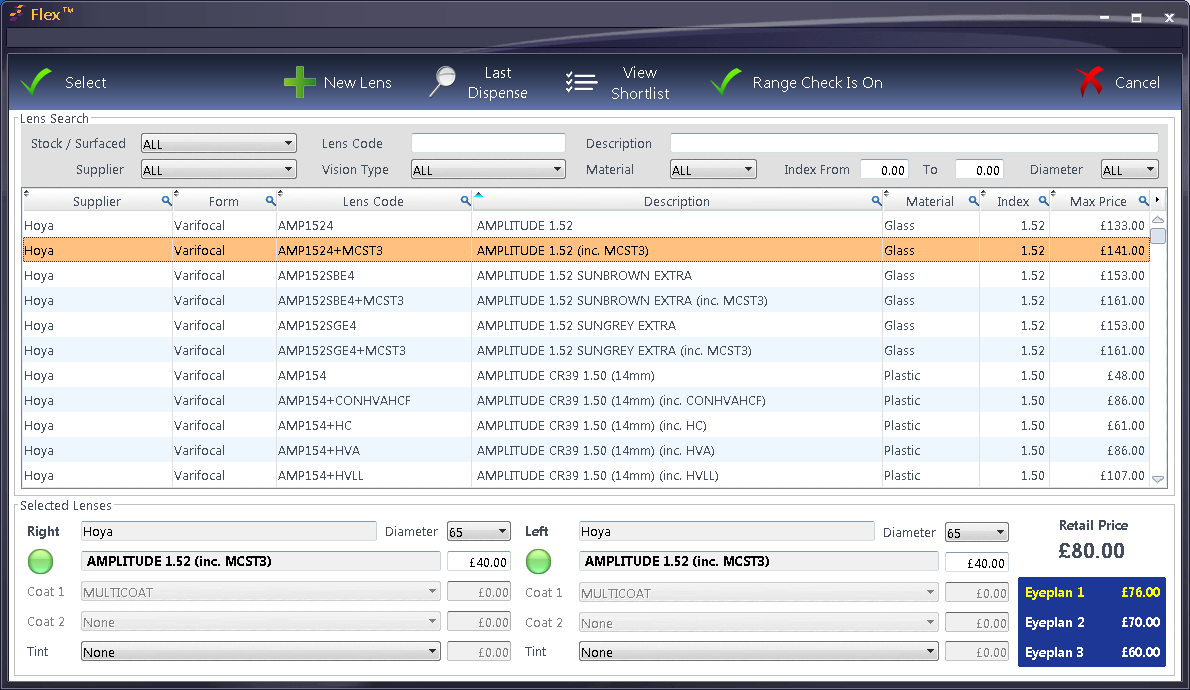
The coloured disc below the Right and Left in Selected Lenses shows that these lenses are in range. In our example, Coat 1 and Coat 2 have been added automatically from the lens catalogue. A Tint could be chosen from the drop-down. The disc options:
Green: This lens is in range.
Amber: There is no range data on the lens (common if a custom lens catalogue is in use)
Red: This lens is not in range.
Note that this data is provided by the lens manufacturers and/or is dependant on practice-entered data, so Optinet are not accountable for any range discrepancies!
Top Buttons in Lens Selector:
New Lens: To add a new lens, press this button and then choose which catalogue you wish to add a new lens to. There is further detail for this under How Do I Update Lens Data?.
Last Dispense: Populates the Selected Lenses with the last dispensed lenses.
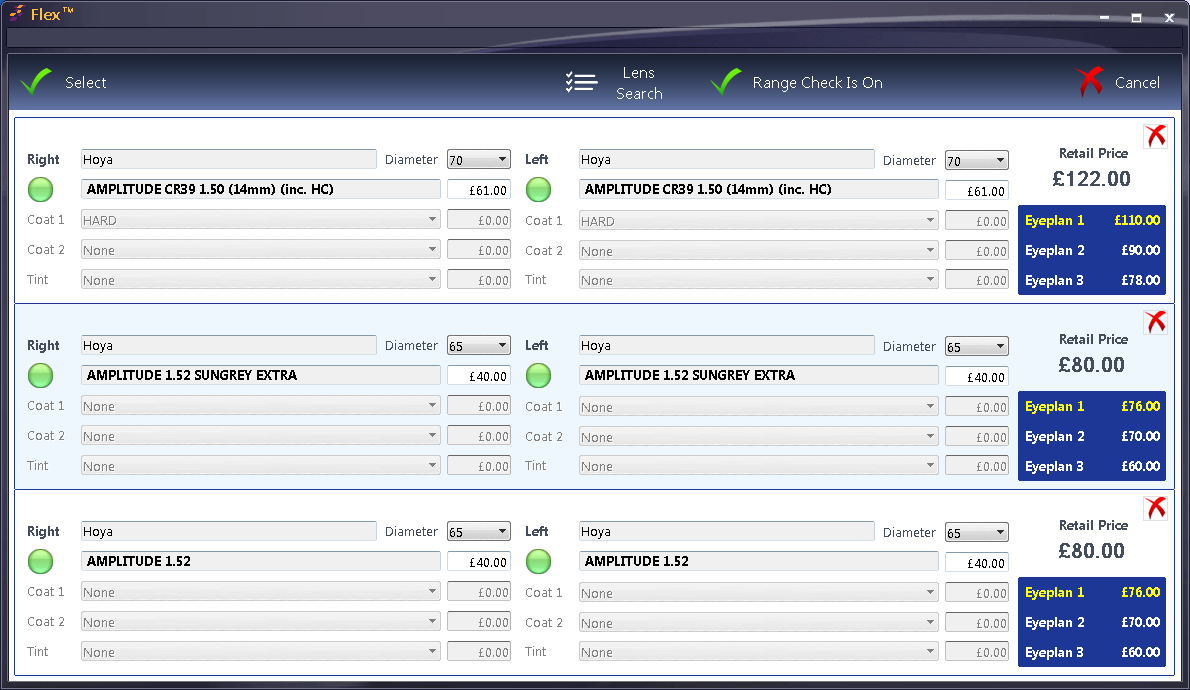
View Shortlist: Several pairs of lenses can be added to a shortlist for a price / specification comparison. Add them by right-clicking on the relevant lens and press Add to Shortlist. These lenses can then be viewed in price-descending order below,:
Press Lens Search to toggle back to the previous window, or select the required option and press Select to dispense these lenses.
Range Check is On (or off) shows if Range Checking is in use. The option of Range Checking being used by default or not is available under Setup - Branch - Data
Add Extras
Extras such as reglaze fees or sundries can be added through here. Find the item in question and double click on it. It will be added to the left-hand pane.

You can search by the Sales Group (of which the default view is selectable under Setup - How Do I Modify my Orders Screen?, the Barcode or Description.
Add Discounts
Discounts can now be added at the point of Dispense. This works the same as Discounts on the Till - please see How Do I Apply A Discount?
Add Vouchers
Vouchers can now be added at the point of Dispense. This works the same as Vouchers on the Till - please see How Do I Add NHS Vouchers?
This completes this section of the Dispense. We are now ready to check our measurements and then save.
Measurements
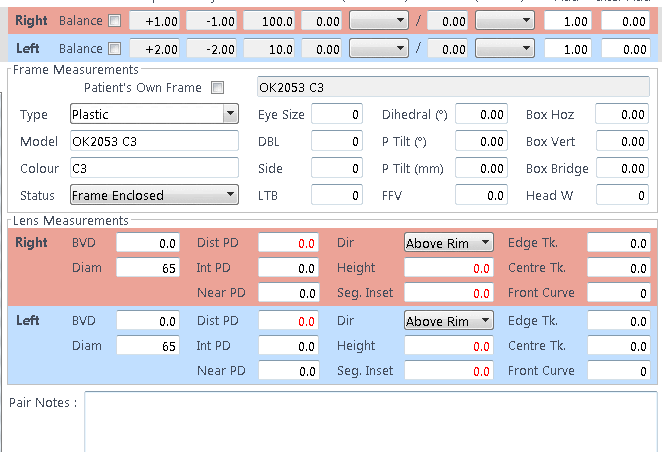
Frame Measurements
The Type, Model, Colour, Eye Size, DBL, Side will all come through from the Stock Item. Other measurements can be bought through from the Trace Frame information. If you press this button at the top of the screen, the below graphic appears:
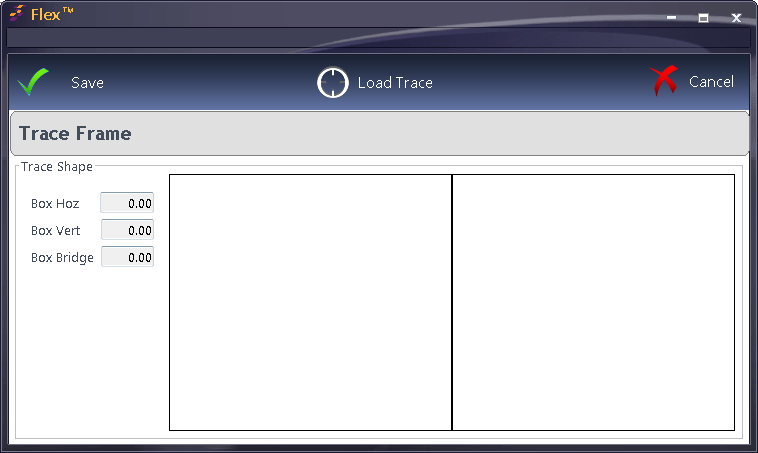
Press Load Trace to link to your VCA tracer.
You can choose your status of Frame Enclosed, Frame to Follow, Supply - Frame Enclosed is the default.
Lens Measurements.
In our example, the PDs and Heights are shown in red - FLEX would warn us before we can save this Dispense. The PD will be in red for all dispenses if it has not been entered; the heights will be required for Bifocal and Progressive dispenses.
Enter the relevant detail and the red figures will turn to black. Tips:
- The default direction can be set under Setup - How Do I Modify my Orders Screen?
- Entering a Binocular PD in the Right PD boxes will split the values, although you can update the Left Rx PD if needed. Values over 40.0 are split automatically. Monocular PDs can also be entered, but nothing will copy into the other eye if this is entered.
Ready to confirm? Press 
Once the DO is happy, they can press Confirm and the confirmation screen will appear. If there are any warnings regarding the parameters, they will be shown below as demonstrated here:

You can also enter Tray Numbers and Required By dates if required. Depending on your practice / VAT setup, you may need to print the Summary Sheet and/or Confirmation Sheet - note that this is not the Order Printout!
This will bring up a box where the Dispense can be sent to the till and the order created.
Once Confirm is pressed, FLEX will ask if you wish to create an order and post it to the Till, or it may do this automatically; it will depend on your BranchSetup.
If the Patient already has a receipt from the last 30 days (although almost always this is from earlier that day), FLEX will ask if you wish to add the work to an existing receipt from the list, or to create a new one. This is most common for practices who use Clinical Billing
FLEX will then prompt if you would like to Print the Order, and the Dispense is complete.