Welcome to the Optinet FLEX Training Portal. Call us on 0845 313 0233 / 01684 577 900.
 How Do I Build My Diary?
Step One
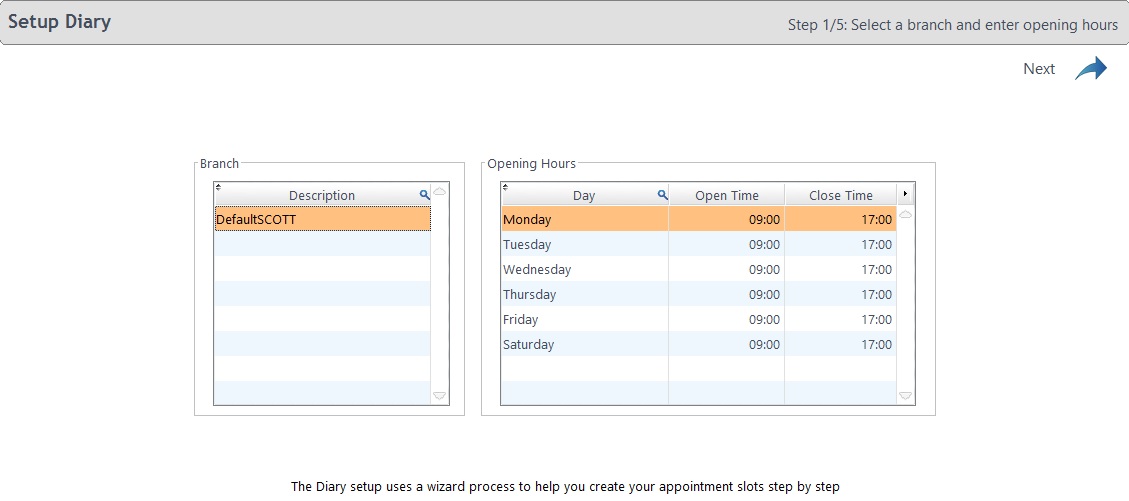
The Branch description (multiple branches available in FLEX+) can be updated and the Opening Hours / Days changed. Double click within the text (for example Monday or 17:00) to update the values. If you try and build appointment slots outside of your opening hours / days, it will warn you when building the diary.
Note that if you have multiple branches in the Branch column, whichever is highlighted is the one which will be updated in the upcoming steps 2, 3 and 4. Step 5 (Staff Planner) is global.
Step Three

The Appointment Reasons can be added to and updated in the third screen. Double click within space under Reason Description to enter a reason (for example Private Sight Test) and update the values. Double-click in the blank space below current reasons to add a new reason. Bear in mind that updating any existing entries will also update all previous appointments booked for that reason! FLEX will warn you about this.
The Length can be set here and when the reason is chosen on the diary, it will update the appointment length if necessary. Leave this column blank if it is variable. Note that before any reason is chosen when booking an appointment, it will stick to the original appointment slot length.
The Background Colour and Foreground Colour can be updated to your own preferences, and a sample of the colour combination is shown at the bottom of the screen. Tip: Do not use the same foreground and background colours!
The check-boxes at the end, Supress ST and Supress CL will stop a Sight Test or Contact Lens reminder being sent out when an appointment is booked. For example: if Mrs Jones has a sight test reminder due to be dispatched in three weeks time but she has come in to book an appointment, the correspondence will be cancelled. The time when reminders are sent out can be customised within the Timeline setup.
NHS Warning being ticked means that when an appointment is booked before an NHS Patient is due back, it will warn the user. This setting can be customised under Setup - Branch
Prepare GOS being ticked means that when NHS forms are to be printed in a batch through the diary, appointments booked under this reason will be shown. See also How Do I Print GOS Forms for a clinic?
Set the Display Order for the order which the appointment reasons appear in the diary. Note that these will be sorted in ascending order, so don't need to be perfectly numerical.
If you want a slot to appear as non-bookable (e.g. Lunch), choose this from the drop-down in the final column. The Non-Bookable reasons can be set here
If it is an appointment reason you no longer use, tick Inactive.