
 Forms
Forms
FLEX allows full automation of your GOS Forms for patients – be it through the Prepare GOS facility in the Appointments Diary for your daily clinic, or printing out an individual GOS Form through the Patient Record as and when needed.
Every practice prints GOS forms at different times with different amounts of data automatically filled in. Most our support calls around GOS forms centre around three distinct areas:
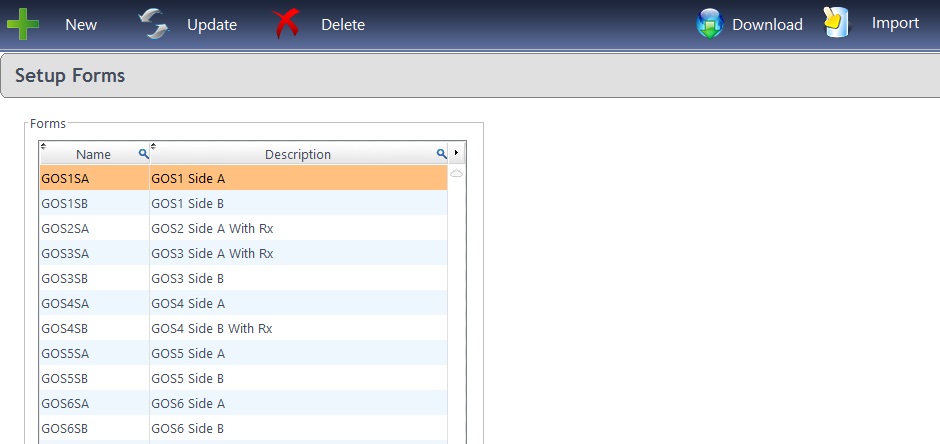
To see and amend your GOS Forms, click to Menu – Setup – Communication – Forms.
Here, you will see a list of all your GOS Forms, including the ability to Download or Import additional forms (for example a GOS2 / 3 with or without Rx).
You shouldn't really need to click on New or Delete.

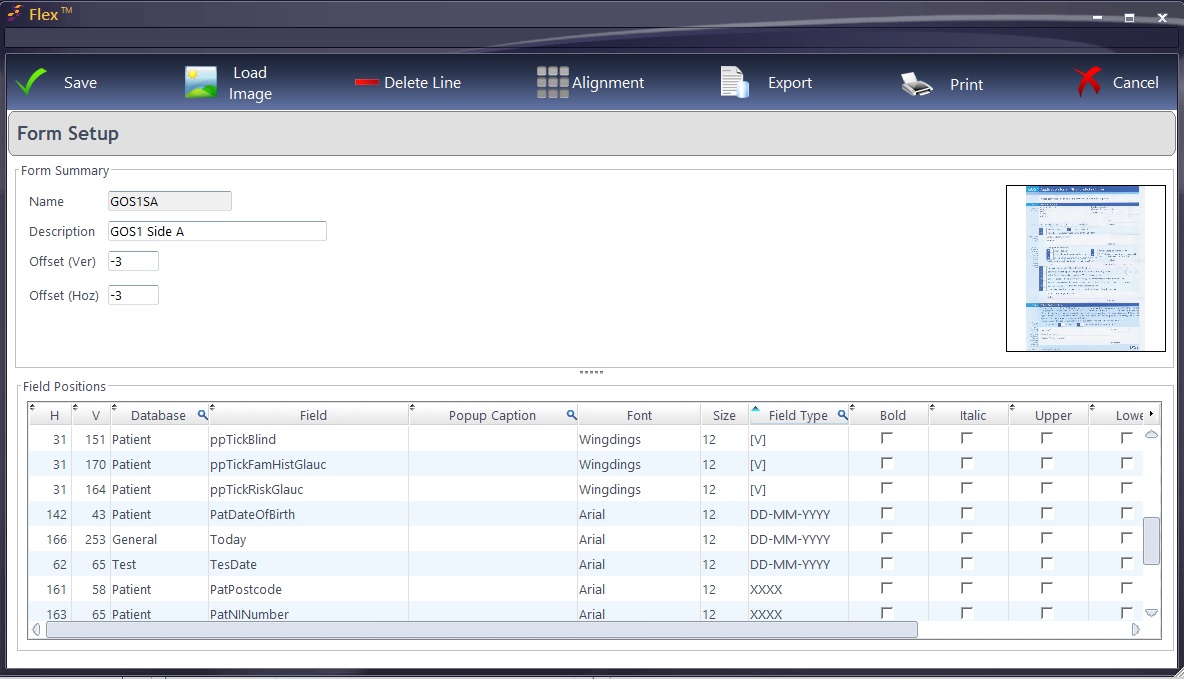
To amend fields, such as dates and Optom details, click on Update. The following window appears.

If your forms are not quite printing in alignment, the vertical and horizontal Offset can be changed. Sadly, as with many printing issues, it is “trial and error” before you find the perfect setup. Note: make sure you are using the paper feed guides within your printer. If your forms are printing with a “diagonal” skew, it is because the printer is taking in the paper at an angle. Click Save when complete.
On the bottom half of the Update screen, fields can be updated in the Field Positions table.

Definitions:
Alignment:
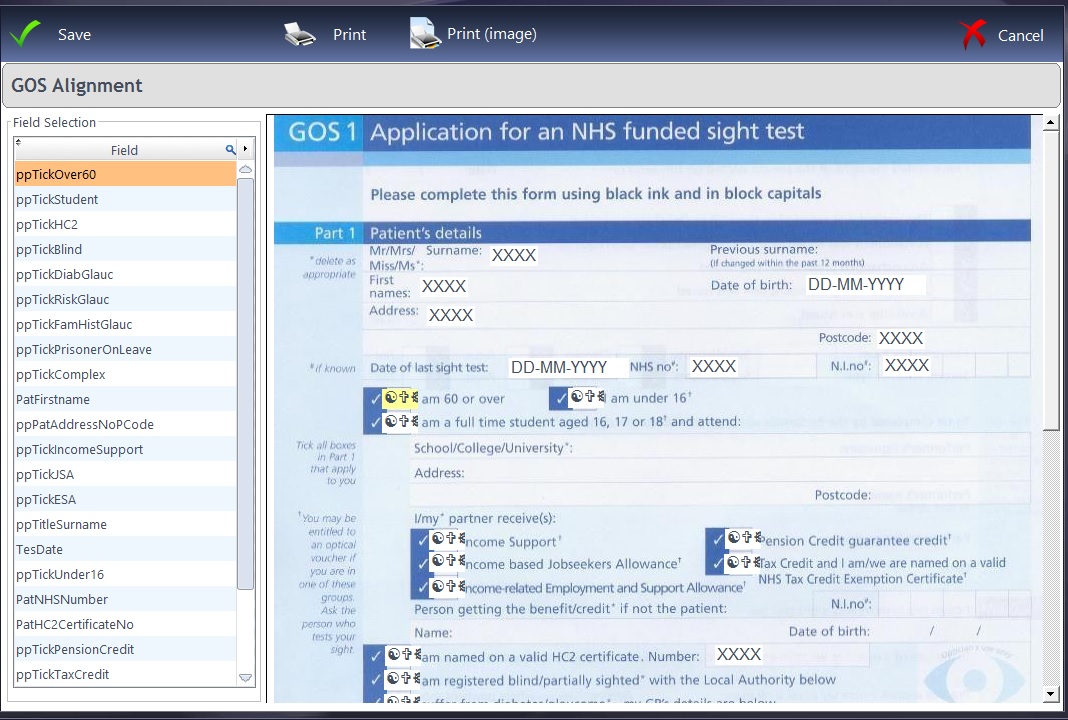
Once you have found the fields that you need, you can see a picture of a GOS form and place the fields accordingly. Press Alignment and the window shown below will open.

Left-clicking on a field in the Field Selection window will show it in yellow, e.g. XXXX in the right hand window. When new fields have been inserted, they always appear at the top-left of the document (where it says GOS1 in this instance).
Right-clicking will move a field to where you want it. Have a go at doing this and see how you get on.
Note that if you use different printers for different forms, the alignments may need to be changed. GOS Forms will print to the default tray of the printer set in Windows. To change where GOS Forms print, please see Setup – System – PC.
Databases:
FLEX itself is a database, and links hundreds of tables together to display the information you need. There are a handful of prevalent tables which are used when merging fields into Letters, Emails and SMS Messages which we also use here. The databases are explained below, along with their use on GOS Forms:
|
Database |
Fields Used |
|
AppSlot
|
Useful for printing the date of the appointment when forms aren’t always printed on the same day, or the Test is yet to be entered. Use AppSlotStartDate
|
|
Branch
|
Useful for entering practice details, such as the address and telephone number (looks at the Contact details in Setup – Branch – Data)
|
|
General
|
Useful for entering today's date if forms are always printed on the day / ad-hoc (use Today, Tomorrow etc.).
The "Ask" facility is useful, it will pop up and ask which Date should print or which Optom should be used (use AskDate or AskOptom respectively). It is useful to use the Pop-up Caption facility so users know which date is being asked for.
|
|
Patient
|
Enter details about the Patient, such as their address and phone number. Note that titles (Mr, Mrs, etc. are found underTitle- TitDescription)
|
|
Test
|
Test details, such as the Date, Optom and Recommendations / advice are found here. Use in tandem with:
|
|
TestRx
|
The Prescription details. These merged fields are all fairly obviously titled (e.g. TestRxDisLeftCyl) - please contact us if you need help. |
To enter your own text onto GOS Forms, simply click into the "PopUp Caption" field and enter your text. This can then be aligned in the same way that merged fields are.